|
OSVR-Core
0.6-1962-g59773924
|


|
|
OSVR-Core
0.6-1962-g59773924
|
|
Writing a device plugin means you'll be building against the PluginKit library, which presents a C API, as well as some C++ header-only wrappers. The API does not impose a required structure, so you can more easily integrate it with an existing driver codebase. However, the following steps can help you build a plugin from scratch. ( For more information, please see the PluginKit documentation, as well as the ::osvr::PluginKit namespace for C++ API where available.)
Make a copy of the directory /examples/plugin/selfcontained as the starting point for your new plugin repository. The core of the code there is in com_osvr_example_selfcontained.cpp - you might want to follow along.
This assumes that your plugin will be "out-of-tree" – that is, not hosted in the main OSVR-Core repository.
EXAMPLE_PLUGIN_README.md file to change the plugin name and set up the build system.Implement a hardware detection callback (to determine if your device is connected):
This can take the form of a class with a function call operator (operator()), taking an OSVR_PluginRegContext parameter named ctx and returning an OSVR_ReturnCode value. The sample plugin source includes an example of this starting around line 88.
com_VendorName_DeviceName.json. You can either use the sample JSON descriptor and modify it according to you needs or use the Device Descriptor Editor to create the JSON descriptor. For each interface (e.g., tracker, button, analog), you will need to describe its semantics – that is, assign useful names to analog channels, etc.). The device descriptor's purpose is to tell the OSVR server what kind of sensors your device has. Specifying the device vendor and the product name in device descriptor file is for informational purposes.Note that these instructions are for drivers that can fully self-configure. Manually-configured drivers are also possible, and are fundamentally the same, except that the hardware detection callback is replaced with a device instantiation callback: see com_osvr_example_Configured.cpp for an example. The function you provide will be called by the server and passed a JSON string of configuration data if the user configures your plugin in the osvr_server config file.
For auto-configured drivers, you should not have your driver listed in the "driver" section of the osvr_server_config.json file: this is only for manually-configured drivers. Otherwise, it will try to find a manually-configured driver of that name and you would get an error similar to:
[OSVR Server] - com_example_MyDevice/DeviceName No driver initialization callback was registered for the driver name DeviceName
These are instructions for Windows and Visual Studio, but they follow similarly for other platforms.
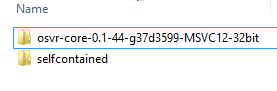
Prepare source and dependencies: Unzip a build snapshot somewhere convenient, and ensure your plugin resides outside of the snatpshot's directory tree.
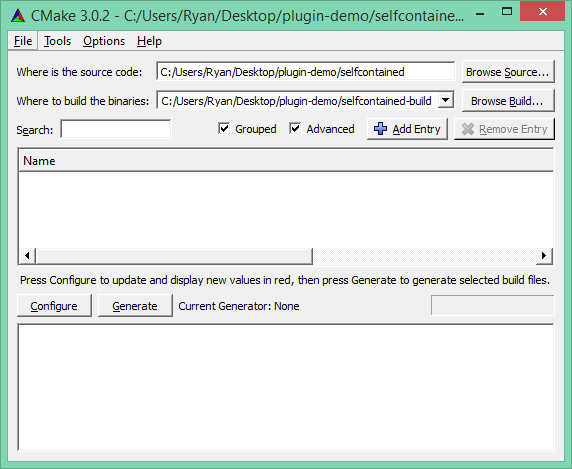
Set the source and build directories: Open CMake, and set the source directory and build directory. It is usually best to build in a separate directory from the source directory. This keeps the source directory clean and free of generated files.
Add the dependency locations to the CMAKE_PREFIX_PATH variable: Click the "Add Entry" button. Enter CMAKE_PREFIX_PATH as the name and choose PATH as the type. Then, click the "..." button to open a folder selection window.

Select the root directory of the snapshot—this is the folder that contains bin, lib, etc. Then click OK to confirm the directory, and OK again to complete adding the entry.

You'll end up back at the main screen, which now looks like this:

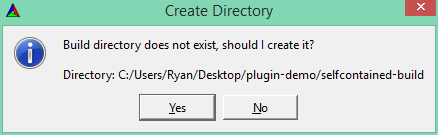
Configure and generate the build scripts and project files: Click the "Configure" button. If the build directory you specified doesn't yet exist, CMake will ask for confirmation before creating it. CMake will now search for any required library dependencies and header files.
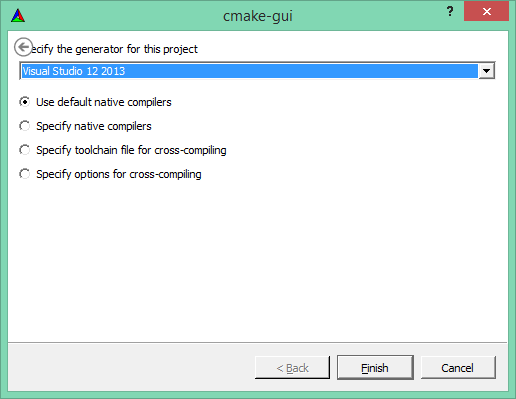
Next, select the appropriate build system or project version for your system. In Windows, you will likely want to select your version of Visual Studio; under Linux, select Makefile. Click Finish to return to the main window. Finally, click Generate to generate the build script or project solution files.
.sln solution file for you if you are using Visual Studio. Double-click to open the project in Visual Studio, and build your plugin. Note that your snapshot may only have a limited subset of the build configurations included (typically Debug and RelWithDebInfo), so building your plugin in other configurations may not work.Locate your compiled plugin files: You will find the compiled plugin .dll file in a subdirectory of build directory named according to the build type (e.g., Debug, Release).

In order for the OSVR server to properly load the plugin and find your device, you will need to create a new osvr_server_config.json file. You can start by modifying an existing config file and changing the configuration appropriately. You will need to add routes to osvr_server_config.json file for sensors that you specified in your device descriptor.
Once your plugin loads successfully, you can view the data that the OSVR server is transmitting from your plugin. If you created a tracker plugin, get the OSVR Tracker Viewer to view the data graphically.
The vrpn_print_devices utility from VRPN can also display this information for select device interfaces (analog, button, tracker):
vrpn_print_devices org_example_MyDevice/DeviceName@localhost
You can find the proper device name when you run the osvr_server. After successfully loading your plugin, the server will print a message similar to:
Added device org_example_MyDevice/DeviceName
Here is some example output from a tracker device:
vrpn_print_devices com_osvr_Vuzix/Vuzix@localhost
Opened com_osvr_Vuzix/Vuzix@localhost as: Tracker Button Analog Dial Text
Press ^C to exit.
Tracker com_osvr_Vuzix/Vuzix@localhost, sensor 0:
        pos ( 0.00,  0.00,  0.00); quat (-0.08,  0.89, -0.05,  0.45)
Tracker com_osvr_Vuzix/Vuzix@localhost, sensor 0:
        pos ( 0.00,  0.00,  0.00); quat (-0.12,  0.78,  0.03,  0.87)
Tracker com_osvr_Vuzix/Vuzix@localhost, sensor 0:
        pos ( 0.00,  0.00,  0.00); quat (-0.12,  0.48,  0.03,  0.87)
Tracker com_osvr_Vuzix/Vuzix@localhost, sensor 0:
        pos ( 0.00,  0.00,  0.00); quat (-0.12, -0.88,  0.03,  0.46)